I spent a day in Sedona as part of a 4-day northern Arizona road trip in 2020, and I knew immediately I would have to go back to Sedona and spend more time. The beautiful red rock formations and miles and miles of trails make this a great area for hiking and other outdoor activities. Even if you are not into hiking, this charming town has so much to keep you entertained. I am an absolute amazing time with this Sedona 3 day itinerary!

Free 3 Days in Sedona Itinerary
It may take several minutes to show up in your Inbox.
Disclaimer: This post may contain affiliate links so if you make a purchase or booking through one of our links we might earn a small commission (but don’t worry, it’s no extra cost to you).
How to Get Here
The closest airport to Sedona is Flagstaff Pulliam Airport and is located approximately 45 minutes north of Sedona. The next closest airport is Phoenix Sky Harbor International Airport and is an approximate 2-hour drive to Sedona up Highway 17. Las Vegas’s McCarron International Airport is the next closest major airport and will take you over 4 hours to make this drive. If you are flying into any of these airports, you will need to rent a car for getting to and driving around Sedona.
Where to Stay

The Sedona area has several hotel and Airbnb options in and around town. We chose to stay near the uptown area so the shops and restaurants were within walking distance. The upscale motel, Cedar Resort Sedona, was the most reasonably priced place I found to follow my Sedona 3 day itinerary. The room had a balcony with gorgeous views of red rocks.
When to Visit
Spring and Fall months have the most ideal warm weather and blue skies. However, these perfect-weather months are also the times when Sedona is the most busy, and the prices are the highest. I visited Memorial Day weekend and experienced full parking lots at popular hikes by 6:00am. The summer heat is almost unbearable, so I would not recommend hiking during this time unless you go super early in the morning. Winter months have colder temperatures, especially at night, but they also see the lowest number of crowds.
What to Pack
Listed below are things I highly recommend you pack for this Sedona 3 day itinerary.
- Water!! Whether you use a hydration backpack or carry bottled water, make sure to pack plenty of water when outdoors!
- Sunscreen – Protect your skin from the sun, and do not forget to reapply.
- Hat – More sun protection to block the sun from your face
- Hiking shoes/boots – Some of the hikes are on steep, slick rock, and people wearing regular tennis shoes struggled to keep their footing. Here are the men‘s version of the hiking shoes I love.
- Hiking socks – The best way to prevent blisters is by keeping your feet dry. Moisture-wicking socks are the best way to do that.
- Microfiber Beach Towel – I packed my microfiber beach towel to take to the swimming holes. I didn’t want to bring the hotel towels, and the microfiber towels fold up to practically nothing.
- Water Shoes – The creek bottoms were very slick which made my water shoes a must-have.
- Backpack – A backpack is a necessity when hiking to carry your water, snacks, sunscreen, etc. that you may need on your longer hikes.
- Printed Maps/Directions – Cell service is spotty when you are not inside Sedona city limits, so I recommend you print maps/directions to all hiking trails, wineries, and swimming holes you plan to visit in your Sedona 3 day itinerary.
Do You Need a Pass?
Yes. Most hikes require a Red Rock Pass which can be purchased online or in-person at many gas stations and grocery stores. Because this area is part of the Coconino National Forest, your America the Beautiful U.S. Park Pass is also applicable for most hikes. Just make sure to display the pass on your dash or hang from your rearview mirror. The West Fork Trail entry is not included with your Red Rock Pass or America the Beautiful Pass, so you will need to pay that fee upon arrival.
Day 1 in Sedona
The night before my Sedona 3 day itinerary began, I flew into Phoenix and drove the 2 hours to Sedona. Since I arrived fairly late in the evening, I was happy I did not have to wake up at the crack of dawn the next morning. If the sun is still up when you leave the airport, you can marvel at the Saguaro cacti that line the highways just outside of Phoenix.
West Fork Trail
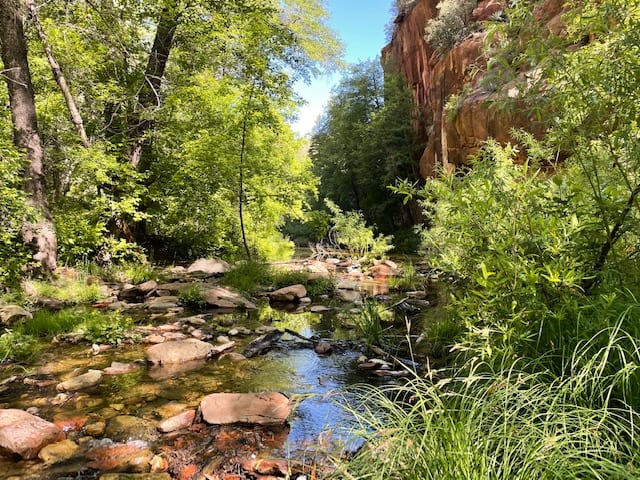
Before heading to the West Fork trailhead, we stopped at the Coffee Pot and got breakfast to-go. The entrance to West Fork does not open until 8:00am, but lines begin to form before that. We arrived at the entrance at 7:45 am planning to eat our breakfast in the car while we waited. To our surprise, the gates had opened early that day, so we ate in the parking lot of the trailhead.
This trail is unlike other hikes in Sedona in that it is very forested and you walk along a stream that you will have to cross several times. Be careful not to slip in the water because walking with wet socks and shoes is never pleasant. This hike is easy but long at 6.5 miles. The trail ends where the canyon walls narrow, and the only path is the creek. Some people were putting on water shoes and continuing their hike through the water to their overnight campsite. However, we turned around at this point.
This walk is beautiful, but I would recommend doing it after a day or two of hiking other trails in Sedona. Most other trails in Sedona feature the red rock formations, and this one would be a nice trail to break up seeing the same types of views over and over again.
Shopping in Sedona

After the 6.5-mile West Fork hike, we were quite hungry. We ate lunch at Creekside Bistro before spending the next several hours shopping and exploring Uptown Sedona. There were so many good finds! I was able to find many Christmas and birthday presents for family, so I was glad I had extra space in my luggage!
Wine Tasting
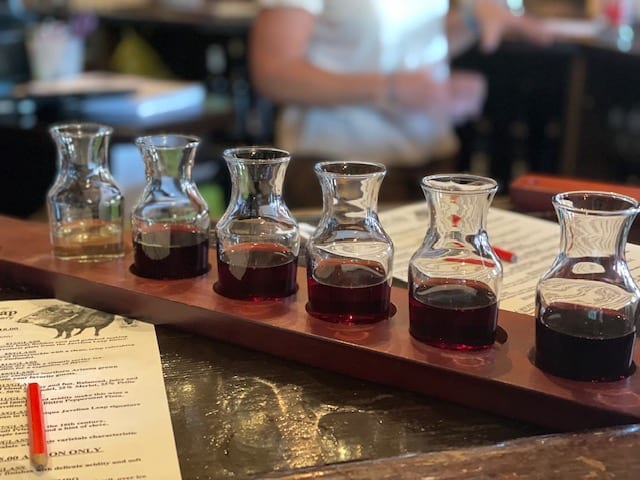
After I spent enough money shopping, I decided to visit a couple wineries just south of Sedona. At Javelina Leap Vineyard, I had a flight of their wines which were mostly reds. Next, I traveled 0.5 miles down the street to Page Springs Cellars for a glass of wine and charcuterie board for dinner.
Day 2 in Sedona
Devil’s Bridge
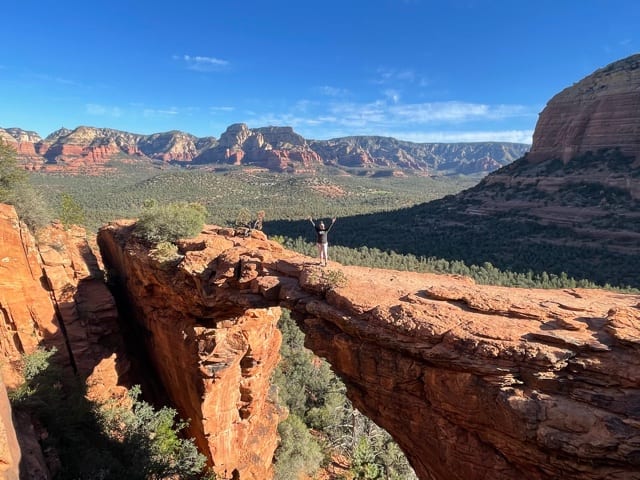
To me, Devil’s Bridge is the most iconic land formation in Sedona. There are two ways to hike the 4.5 miles: one is along a jeep trail and is awful, and the other is a nice walk that starts at the Mescal Trailhead. If you follow directions to the Devil’s Bridge trailhead, your GPS will take you to the awful way of hiking. Follow my Dare to Walk on Devil’s Bridge for the best way to hike this trail.
We arrived at the trailhead at 5:45am and the Devil’s Bridge parking lot was already full, and people were parking along the street. This is a very popular and crowded trail. The first mile is a fairly easy walk no matter which trailhead you start from. At 1 mile in, the two trails become one, and the elevation begins to increase significantly. Be prepared to rock scramble near vertically as you approach the bridge.
Once you reach Devil’s Bridge, you will undoubtedly have to wait in a line to walk out onto the bridge for your photo opportunity. I got to the bridge at 6:30am and had to wait 45 minutes in line. I recommend you to make nice with your neighbors, and ask them to take a picture for your group.
Birthing Cave
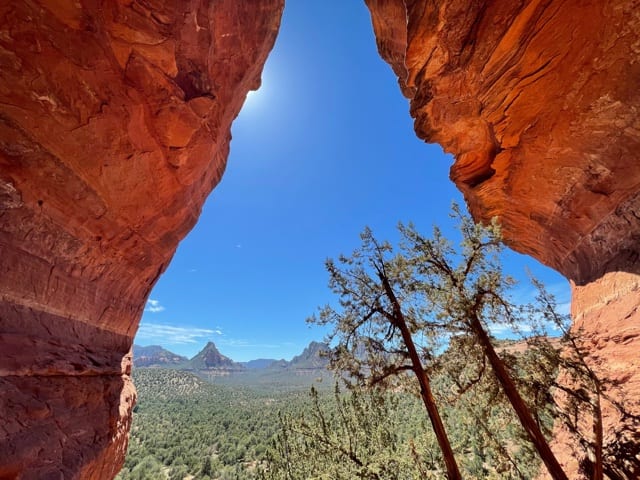
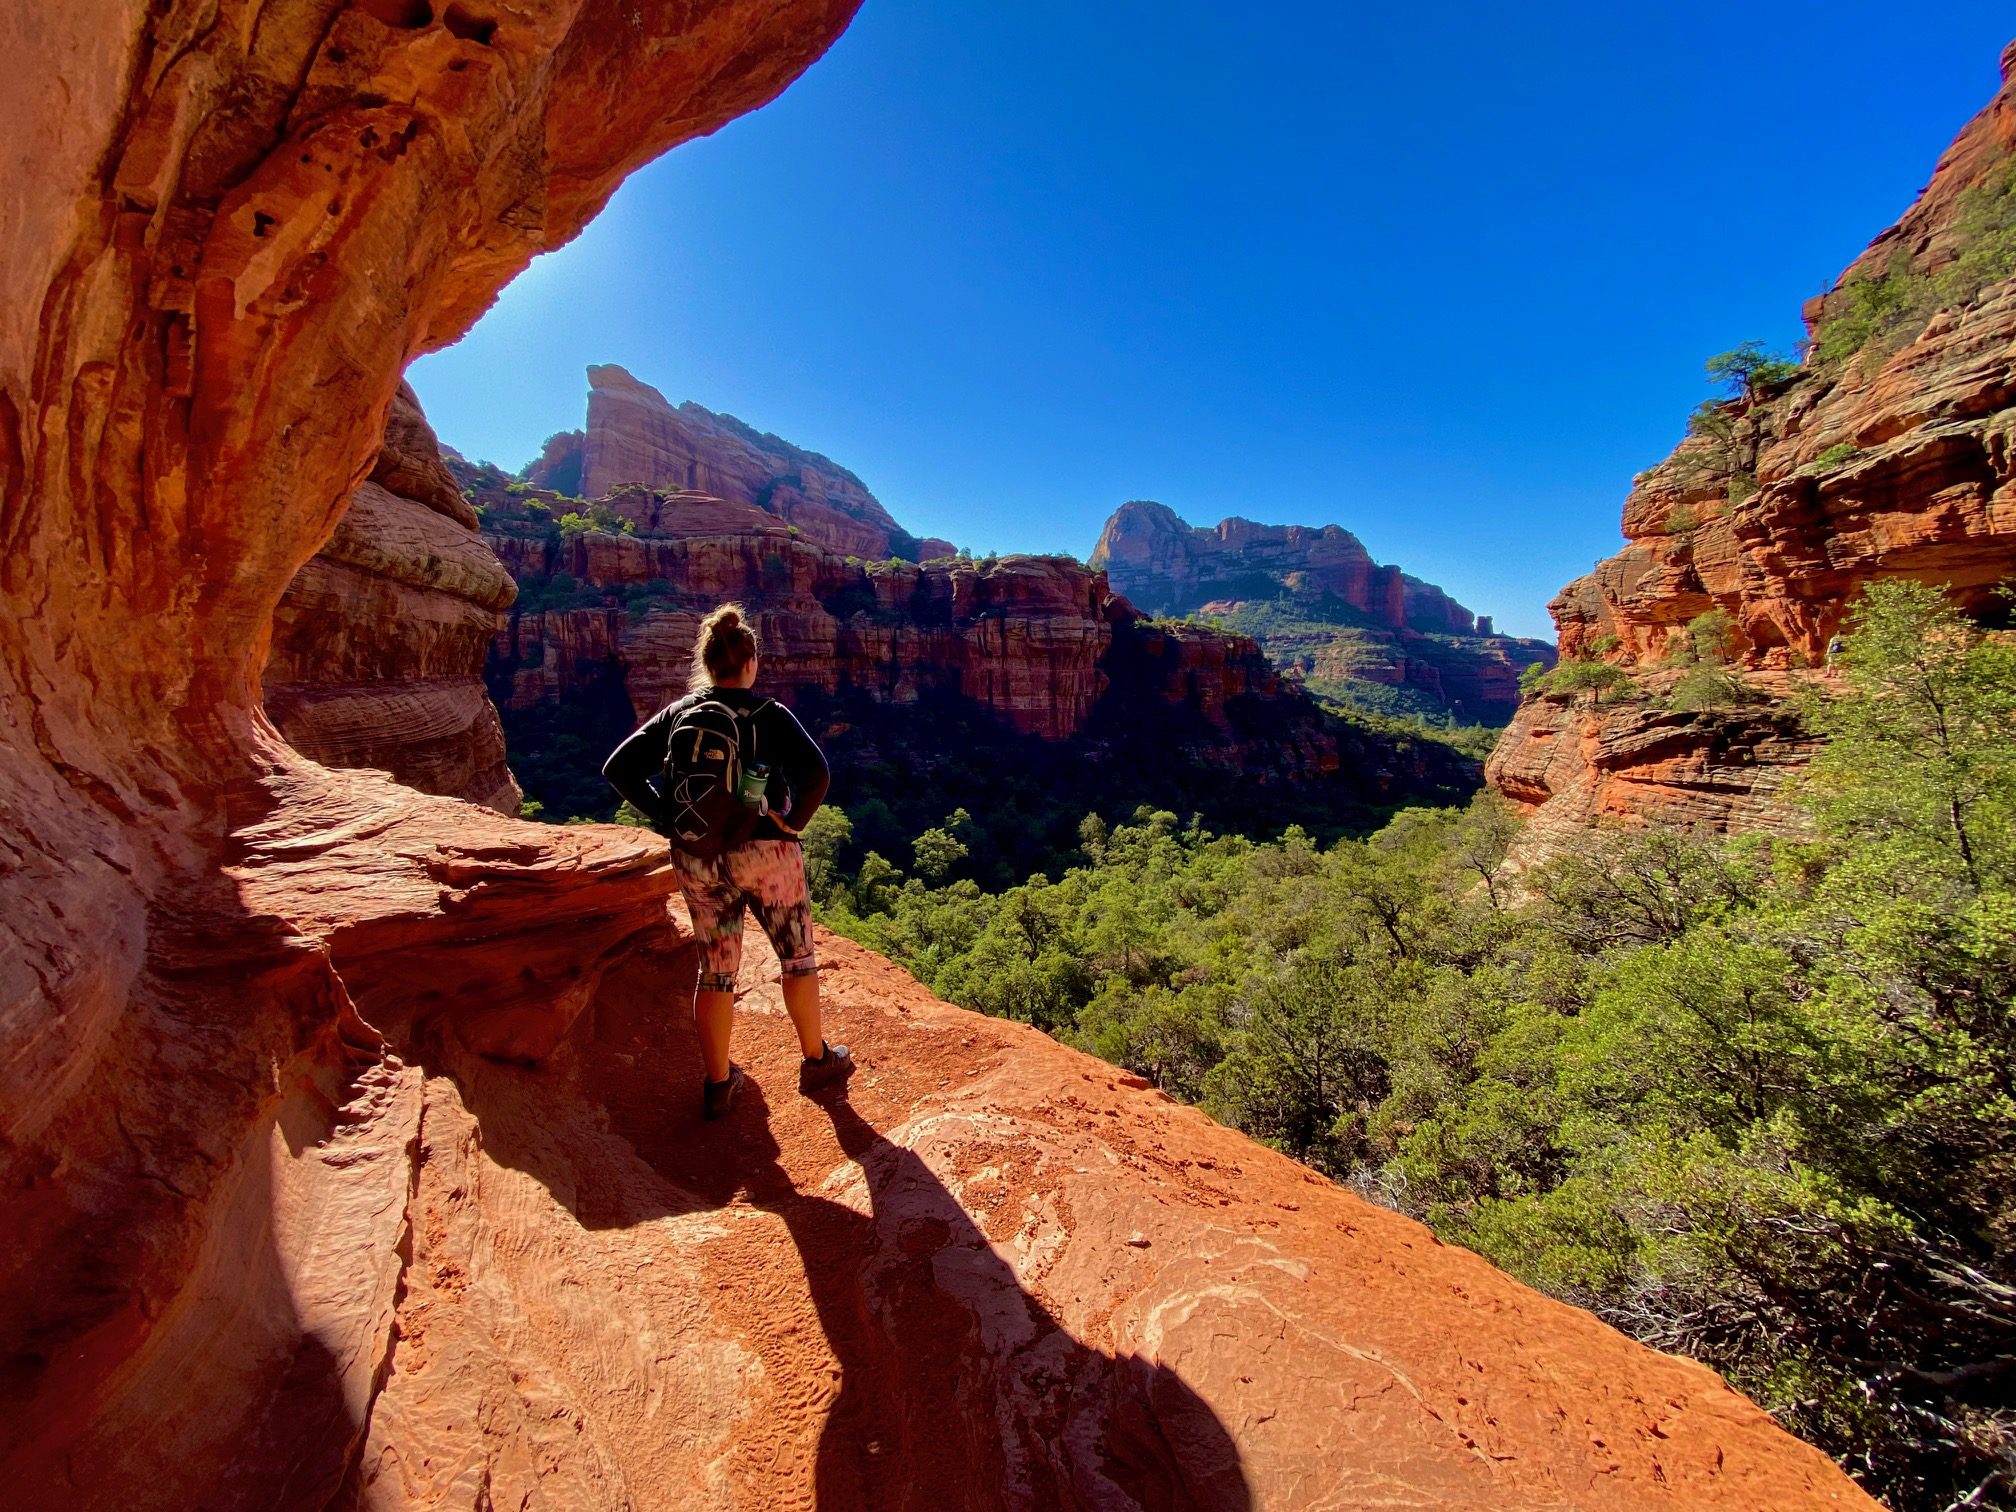
The Birthing Cave is a 2-mile, really awesome hole in the side of the red rock cliff with stunning views. The hike is easy until just before you reach the cave where the incline increases significantly. This spot is a little difficult to find as you will have to go off the main trail to find it. Follow these detailed instructions, and you will find it easily.
Hotel Pool Time
After hiking, I had brunch and a cocktail at Saltrock Southwest Kitchen. I tried to go to Sliding Rock State Park or Grasshopper Point swimming holes, but their parking lots were full and were turning people away. Some people were parking along the highway and walking in, but I would not recommend this. Many cars are driving at high speeds, and there is no shoulder. I decided to cool off at the hotel pool instead. After pool time, I had delicious Italian food at Bella Vita south of Sedona.
Day 3 in Sedona
Subway Cave via Boynton Canyon Trail
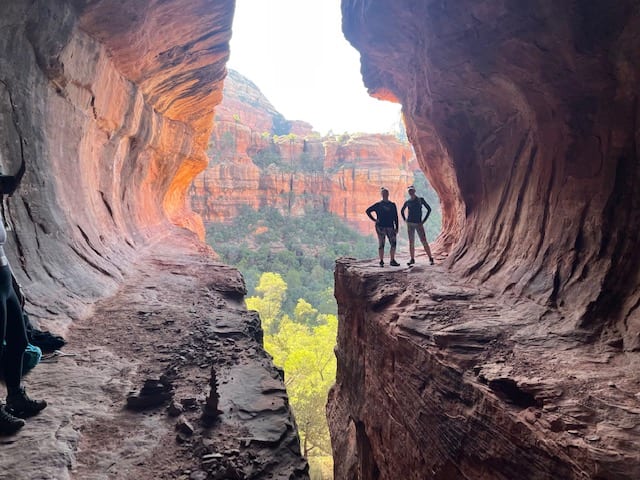
The Subway Cave, also referred to as Secret Cave, was a last minute add to the itinerary, and I am so glad I included it! This not-so-secret “secret” cave starts along the Boynton Canyon trail which is beautiful on its own. About 2 miles into the hike, you will have to go off the main trail. The rest of the trail to Subway Cave is narrow and not maintained, so it can be difficult to find. Most of the people hiking on the Boynton Canyon trail are headed to this secret cave, so you can ask others for directions.
Once you get to the end of the trail, there are two ways to ascend into the cave. One is straight up the middle which is very steep. I was unable to get up this way, but most people were able to. However, just to the left of the cave entrance is much easier path. Just scramble up some fallen rocks and walk around the cliff’s edge until you get inside the cave. Also on the cliff’s edge is some Sinagua ruins you can check out.
Red Rock Crossing
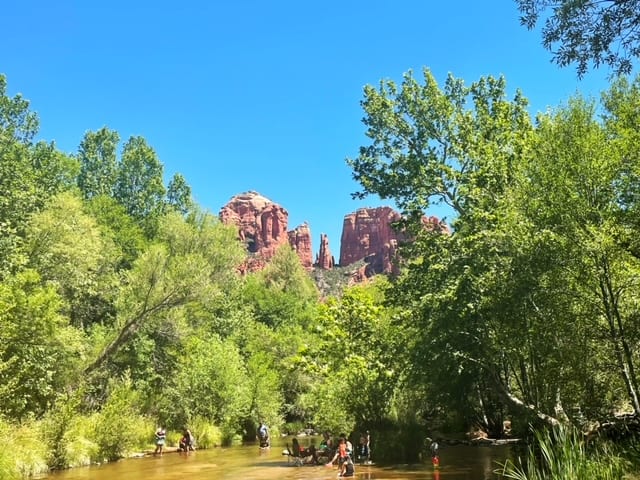
After completing the Subway Cave hike, I ate a late breakfast at Wildflower which is located in the shopping center across the street from Cedars Resort, changed into a bathing suit, and left determined to find a swimming hole. Red Rock Crossing at the Crescent Moon Picnic Site was the chosen swimming hole of the day. The parking area was full, so I parked about a mile away along the street where others had already started parking before me. This swimming hole did not disappoint! The flowing creek kept us cool in the afternoon heat while we marveled at Cathedral Rock in the background.
I finished the Sedona 3 day itinerary with pizza for dinner at Pisa Lisa. I recommend sitting at the bar if you are not traveling with children. They serve the full menu, and the bartenders are very entertaining.
You May Also Be Interested In:
The Best of Sedona: Things to Do
Discover Northern Arizona in 4 Days
New Mexico Road Trip: A 5-Day Itinerary
A Whirlwind Utah Road Trip: 6 Parks in 7 Days


4 Comments
Comments are closed.